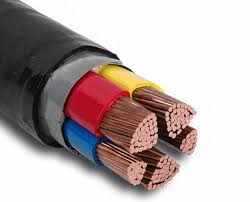
6mm armoured cable is an extremely durable and flexible choice for electrical installations where durability and protection are essential. It is ideal for powering heavy-duty equipment or running electrical supply in difficult environments, it comes with superior mechanical protection thanks to it’s steel wire armor. To ensure a successful installation, follow this comprehensive guide.
1. Create the plan for installation Begin by making a plan for the cable route. Assess the installation site to determine the ideal route that will accommodate the 6mm armoured cable, taking into consideration potential hazards and obstacles. The route should be designed to minimize the risk of physical damage while also ensuring access for future maintenance. Take into consideration the distance as well as any shifts in direction when making the plan for the installation.
2. Gather tools and supplies: Collect all necessary tools and equipment prior to beginning. You’ll require the 6mm armoured cable, appropriate connectors and cable glands and a cable cutter the cable stripper, as well as an crimping device. Make sure you’ve got all necessary safety equipment, like gloves and eye protection, to handle the cable safely.
3. Prepare the Cable: Before installation, you should prepare the armoured cable by stripping away the outer sheath with care. Use a cable stripper to expose the armour of steel wire before removing the insulation inside to expose the conductors. Be cautious not to damage the conductors or the armour during this process.
4. Installation of the Cable To ensure a direct burial installation, dig the trench at least twice the depth of the cable’s diameter and put the cable into the trench. Ensure that your cable has been laid straight and is not bent. If you are installing it inside a conduit or cable tray, ensure the cable is supported and that it is not bent sharply.
5. Fit Cable Glands and Connectors Attach cable glands to both ends of the cable to provide secure connections as well as strain relief. Attach the cable glands in accordance with the instructions of the manufacturer, making sure that they are secure and that the armour is properly clamped. Attach the conductors to their respective terminals with crimping tools ensuring that the connections are reliable and secure.
In the end, putting in 6mm armoured cable involves careful planning, precise preparation and secure connections. By following these steps you can guarantee a reliable and safe installation, suitable for demanding environments and applications that require heavy-duty.


